Showing posts with label baking. Show all posts

Thursday, 21 October 2010

Four Things (take 2)

I wrote a long-winded and detailed post but it was eaten! Here is the quicker version of a bunch of stuff I made.

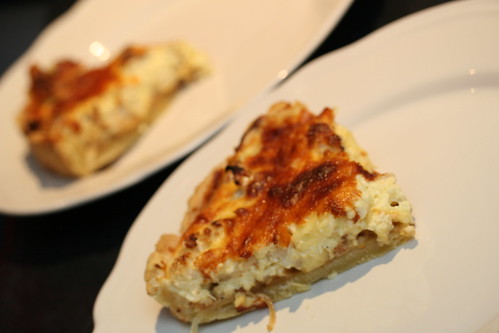
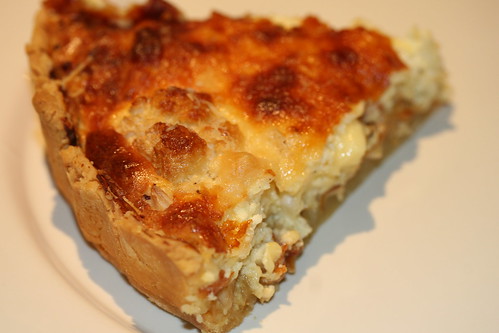
1. Cauliflower & Caramelised Onion Tart (from smitten kitchen)

Cauliflower & Caramelised Onion Tart 3


So delicious. So easy.

Cauliflower & Caramelised Onion Tart 2

The pastry was flaky and tasty, the filling was the sort of things that dreams are made of and it was all easy enough to make quickly after work. Do it.

2. Franken-brownies

Franken-brownies 1

Or, what happens when you decide to add other foodstuffs to brownies.

NW: gummi bears

NE: mini M&Ms

SE: mini marshmallows

SW: turkish delight

Franken-brownies 3

Science was the winner. Also, turkish delight.

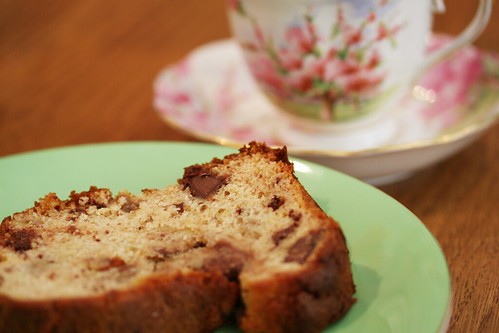
3. Chocolate Banana Bread

Banana Bread

I love bananas. Just not in things.

Until now. This recipe has changed my banana bread-related life. I am now the kind of person who makes banana bread regularly.

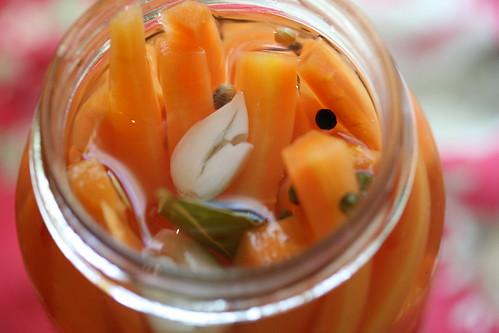
4. Pickled Carrots

Pickled Carrots 1

We get a fruit & vegie box from Organic Angels once a week and, sometimes, we end up with an excess of stuff. I generally use a bunch of carrots during a week but we always seem to have more. They multiply in the fridge. I needed to take action.

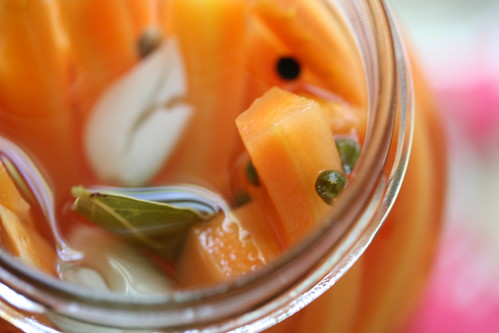
Pickled Carrots 2

I decided on pickled carrots using this recipe from David Lebovitz but instead of fennel, I used coriander and cumin seeds and some peppercorns. SO GOOD OMG.

Saturday, 4 September 2010

Remember me?

Probably not.

I'm going to try and not make excuses because blogging isn't meant to be an obligation but I will say that I have still been cooking and eating and having adventures and, overall, I think my complete lack of blogging for the past 8 months has been due to the fact that learning how to be a teacher takes up a lot of time! A LOT! Particularly when you are trying to work two other jobs around it. Holy mackerel, kids! (Also, my camera's screen has been playing up a bit. It is frustrating.)

That said, yesterday afternoon signalled the end of my teaching rounds for this year. Obviously, I still have uni for the rest of the year but no more school time. It's weird - I am totally jazzed that time is passing and I am closer to becoming a teacher but it is also really sad. The school was fantastic (the kind of school dreams are made of, particularly for rounds) and the students were engaged, bright and funny. I think I will miss my two classes of Year 11s the most and, to thank them for being so awesome to teach, I made them some Catastrophe Cookies for class yesterday. They were very popular and, thus, I bought the love of my first class. Note to self: food works.

Anyway, let's use this moment to clear some of the 8 months worth of photos I have on hand. There probably won't be heaps of info but, hopefully, it will get me in the mood to do some more up to the date blogging.

At some point in February, I made my first ever spring onion pancake. Please excuse the iPhone photo:
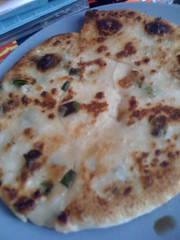
Spring Onion Pancake
So easy and tasty. In fact, I believe I lured our 'new' flatmate, Byron into moving in by promising him spring onion pancake. I have yet to make it again. Oops.

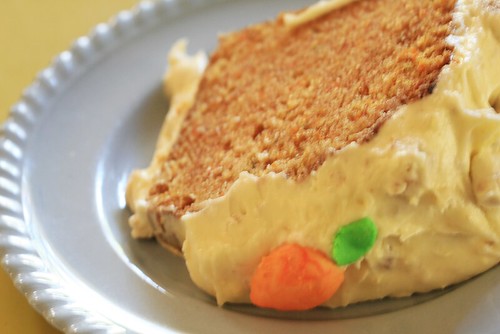
For Easter, I made an amazing carrot cake (recipe from The Pioneer Woman) and it was super-tasty.
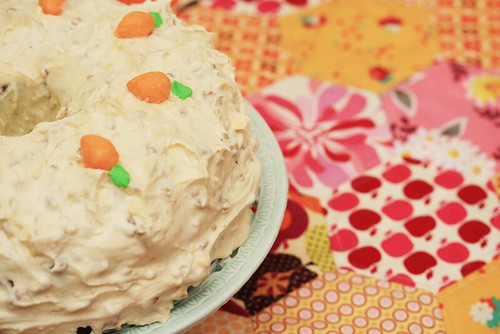
easter cake 1

easter cake 2

I also made some Hot Cross Buns, using the amazing BBC recipe which they have since changed! WHY, BBC?!
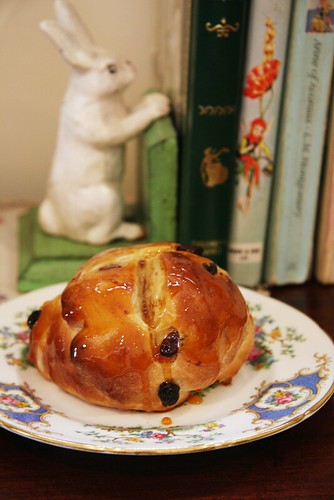
a delicious treat

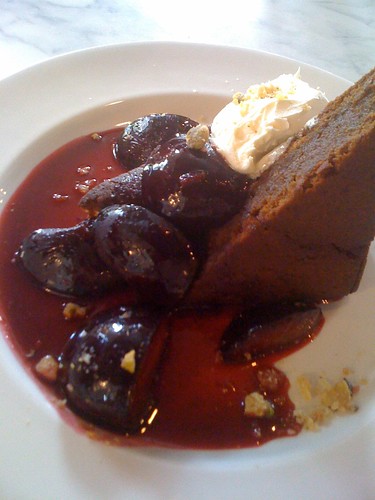
For the lovely Miss Jen's birthday, I made this Gingerbread Layer Cake with Lemon Frosting.

fuji 12

The birthday girl seemed to enjoy it and I remember it was nice but not groundbreaking. It was, however, a lovely birthday picnic and anytime you rock up with
a cake and cake stand in the middle of the botanic gardens, you do become very popular.

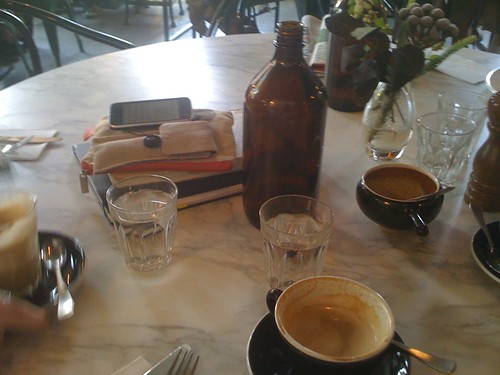
Three Bags Full. Believe the hype. (Also, get there ridiculously early to get a table.)
IMG_0499

IMG_0501

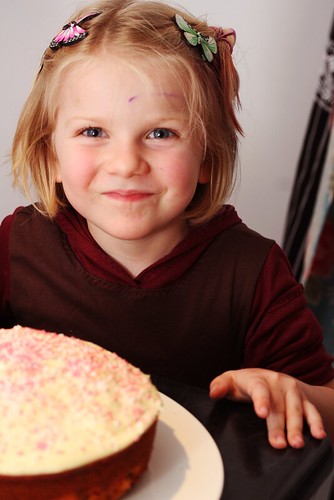
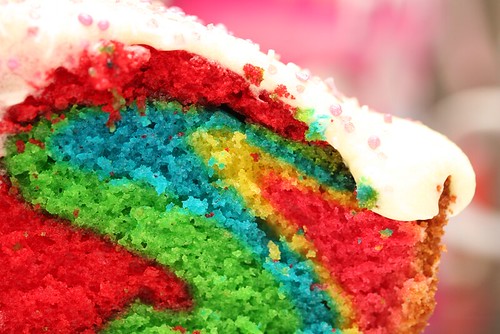
The lovely M and I have been baking buddies for the past little while. Our first effort was a Rainbow Cake.
m and the rainbw cake

Don't worry - I checked with her mother before filling her full of food colouring.
rainbow cake

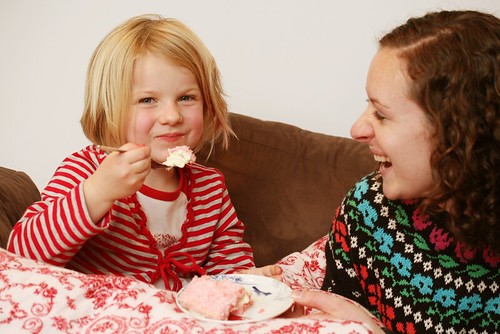
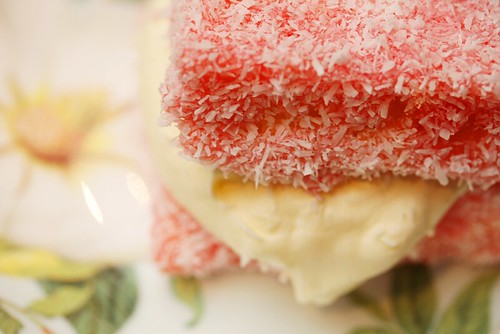
A month or so later, we decided to make something else. She had wanted to make a chocolate cake but as soon as she saw the pink jelly cakes in the recipe book, it was impossible to convince her otherwise.

They looked pretty enough . . .
pink lamingtons 2

Expectations were high . . .

pink lamingtons 3

But . . .

pink lamingtons 4

Oh, I hear you, bb. They weren't so great. As M said, "I thought they had a flavour but they don't."

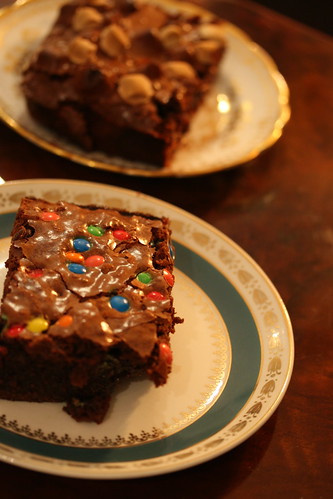
Finally (for now), the other day we made the most ridiculous brownies the world has ever seen.
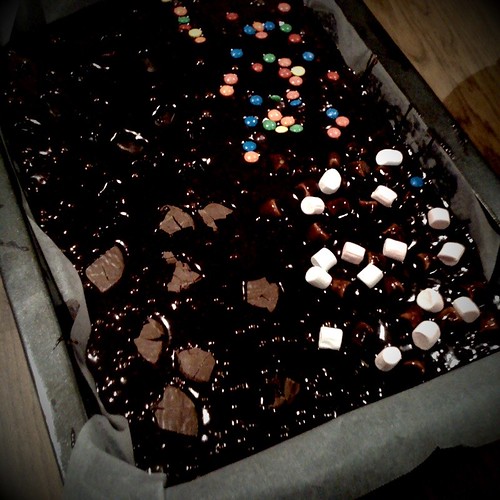
IMG_0040

Each quarter was a different stroke of evil genius: marshmallow, gummi bear, mini m&ms and turkish delight.

AND THEN WE MADE OURSELVES SICK EATING THEM.

Marshmallow and Turkish Delight were the best. Would make again.

Anyway, I do have some other stuff (Daylesford, St Andrews Market, misc other things) but this has become a bit ridiculous already. I will be back soon - I promise!
Sunday, 31 January 2010

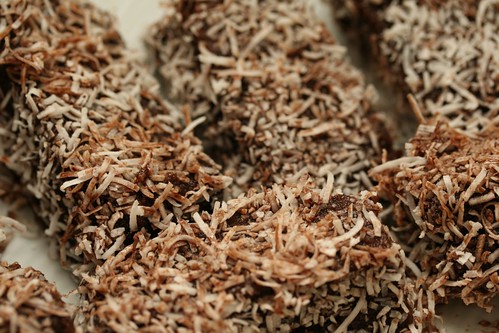
Lamingtons

Lamingtons 1

Esther and I spent Survival/Invasion/Australia Day watching this video and watching the Gilmore Girls and doing much-needed washing. My one patriotic thing (apart from ignoring this ridiculous holiday which, I think, is a fairly patriotic stance to take) was to make lamingtons because they involve coconut, jam, cake and chocolate.

Lamingtons 3

There's lots of talk about lamingtons being too much hassle to bother about that I've heard but I think they're fun to make. I mean, if I had to make 70 once a week or some such, then yes, it would blow. But as a once in a while thing - totally worth it!

I have made lamingtons in the past - gluten-free lamingtons no less - and had a whale of time doing so. That time, I simply made a gluten-free butter cake (from a cake mix) and then did the whole chocolate/coconut business. This time, I started from scratch.

Lamingtons 4

Lamingtons

for the sponge (based on Nigella's Victoria Sponge recipe):
225g soft unsalted butter
225g caster sugar
1 tsp vanilla extract
4 large eggs
200g self-raising flour
25g cornflour
1 tsp baking powder
4 Tbsp milk

Prehear oven to 180C and line whatever tin you wish to use. I went with a deep brownie pan which meant my cake was quite thin and I needed to do a double layer of cake on some of my lamingtons.
Crack out your food processor (you can do it without one but it is so simple with one).
Put all the ingredients bar the milk and process until it is a smooth batter. Then pulse as you slowly add the milk.
Pour into your pan and bake for around 25 minutes (or until the cake is coming away from the edges of the pan).
I leave the cake in the pan to cool for about half an hour or so and then flip out onto a cooling rack to cool completely.

If you aren't using a food processor, cream the buter and sugar, add the vanilla and the eggs, one at a time, adding a spoonful of flour between each egg. Fold in the rest of the flour and cornflour and don't add the baking powder. When it is all mixed in, add as much or little milk as you need.

NOW FOR THE COCONUTATION!

2 cups icing sugar
1/2 cup of cocoa
66g butter
1/2 cup of boiling water
Jam of your choice (I used strawberry)
A whole lot of coconut (I used shredded but dessicated is more traditional)

Cut the edges off your cake, as well as slicing off all the delicious brown bits, leaving it all exposed white sponge that is ready to suck up the chocolate icing. (You can keep all the bits for trifle or similar). Cut your cake into your preferred shape - I ended up with rectangles but squares, stars, circles - it is up to you! I then halved them and put a bit of jam in to stick them back together.

Mix the boiling water and butter in a largeish bowl. When the butter has melted, sift in the cocoa and the icing sugar. Stir it around into a a delicious chocolate soup. Pour your coconut into relatively shallow bowl, good for rolling things in and set up a little assembly line - jammified cake, chocolate soup, coconut, final plate.

Let me level with you, peeps - I use my hands for this bit. It is messy but totally easier.
Dip the cake into the chocolate, making sure your coat all of the outside. Then roll in the coconut and plop on the plate. They are pretty delicate so it is best to leave them for a little bit to set (if you can stop yourself).

Wednesday, 27 January 2010

Daring Bakers: Nanaimo Bars

Nanaimo Bars 4

The January 2010 Daring Bakers’ challenge was hosted by Lauren of Celiac Teen. Lauren chose Gluten-Free Graham Wafers and Nanaimo Bars as the challenge for the month. The sources she based her recipe on are 101 Cookbooks and www.nanaimo.ca.

This month's Daring Bakers had me very excited as I love Canada and I love bars and I have actually been to (well, through) Nanaimo. I was also excited because the host, Lauren is a coeliac and she asked everyone to try the gluten-free baking path. I spent four years being a gluten-free home cook and it is so awesome to make coeliacs something that they haven't had for ages i.e. croissants.

In the end, I ended up making the glutenful version because I was running out of time and I didn't have enough gluten-free flour in the pantry so I feel a bit like I betrayed Lauren but I was so happy that gluten-free baking was in the spotlight this month.

Graham Crackers 1

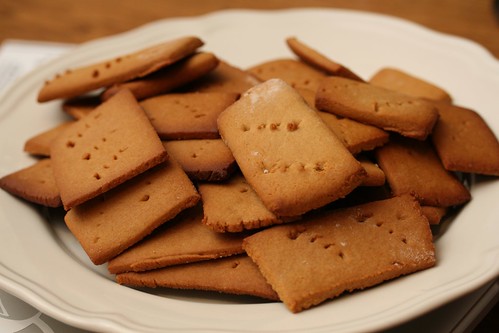
We had to make the graham crackers first which was a bit thing for me. As an Australian who grew up reading the Babysitters Club, Sweet Valley High and various other trashy books that involved smores and other exotic food. All I gleaned from these books at the time is that graham crackers were involved in some way. When I made these the other day, I ended up making a smore by melting a marshmallow over my gas stove and mushing it the cracker and trying to melt the chocolate using the gas as well. It wasn't super successful but I totally dug the concept. Go, BSC!

Anyway, crackers! I kind of imagined these as being a Marie biscuit or a digestive biscuit but they were much more gingerbready than that. There was also something of a Tiny Teddy (honey, not chocolate) about them too. They were delicious and we still have a whole bunch left, waiting for me to think of something to do with them. I know a bunch of people had an issue with the dough being supersticky but I didn't have this issue at all.

Nanaimo Bars 3

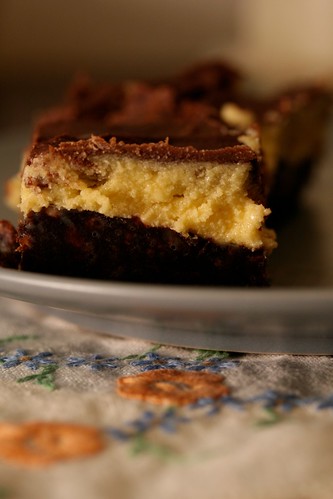
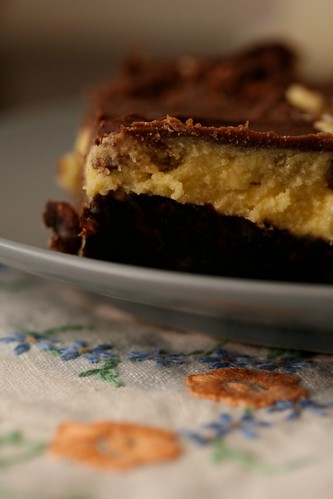
Then I made them into Nanaimo Bars! The bottom layer is essentially like a hedgehog slice - I put graham crackers, chopped almonds, coconut and rice bubbles. Possibly too many additions but I couldn't help myself.

The middle layer is a sort of buttercream with custard powder added. It was super sweet so I added in some lemon juice and a little bit of cream cheese to cut through the sweet.

The top is melted chocolate - something I did too quickly and so it went lumpy. FAIL.

All in all, these were amazing but super-sweet. I enjoyed the challenge but I'm not sure I'd make them again because they were even a bit too much for this sweet tooth household.

Nanaimo Bars 2

Thursday, 7 January 2010

Christmas Morning Muffins

Christmas Morning Muffins 1

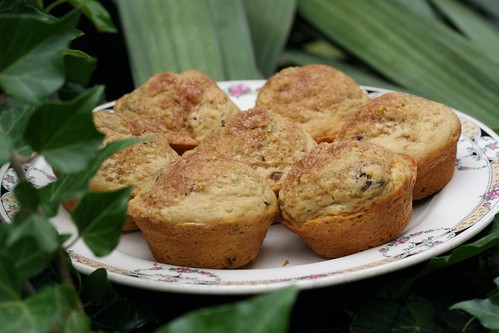
Cranberries and chocolate and oranges, oh my!

We spent Christmas eve up in the hills with Esther's mum, eating falafel, opening presents and watching Wind in the Willows (2006) - seriously, Mark Gatiss = Best. Ratty. Ever.

I also decided to make these muffins that I saw on Ezra Pound Cake as they combined a bunch of things I love and I thought they sounded easy and festive.

In conclusion, DELICIOUS! I will be making these again.

Christmas Morning Muffins 2

Friday, 25 December 2009

Daring Bakers: Gingerbread House

December 2009 Daring Bakers 2

The December 2009 Daring Bakers’ challenge was brought to you by Anna of Very Small Anna and Y of Lemonpi. They chose to challenge Daring Bakers’ everywhere to bake and assemble a gingerbread house from scratch. They chose recipes from Good Housekeeping and from The Great Scandinavian Baking Book as the challenge recipes.

I’m beginning to think that my Daring Bakers motto should be “best laid plans” because this was another month of shenanigans. I was very excited when I saw the challenge and started planning a very Aussie Christmas Gingerbread House i.e. backyard cricket, dry grass, tin roof. There were plans and engineering meetings and decoration conferences in the confectionery aisle of the supermarket.

And then . . .

I chose Y’s dough because I had all the ingredients in my cupboard and I liked the spices that were involved but I had a few issues with the dough - it came together easily enough but after chilling overnight, it did not roll, it crumbled. So, I stood there smushing it back together to try and get a flat enough thin to cut my wall out of. Finally, I had all my pieces and they had a cooled and it was time for the simple syrup.

Let's consider this for a moment. Me + molten sugar + pretty decorationing + tiredness = me burning myself with said molten sugar. And then Esther burning herself on the syrup. So I thought "oh well, I won't decorate it as nicely as I wanted to. I mainly just want to put it together!"

So I did. And, holy mackerel, it was ugly. SO UGLY! SO UGLY THERE AREN'T ANY PICTURES!

There's another reason why there aren't any pictures.

I smashed it. With my rolling pin. A lot.

I snapped and had had enough of this ugly gingerbread house - all the time and energy that had gone into the construction for an UGLY outcome was too much for me - it was smashing time.
At first, it wasn't very carthatic but then I hit my smashing stride and I felt a lot better.

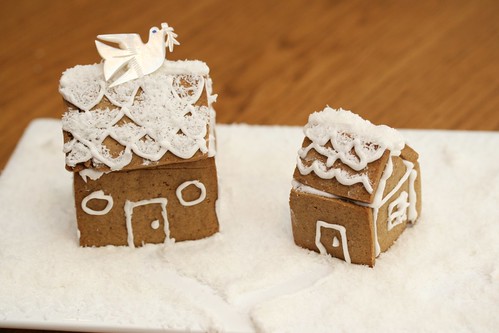
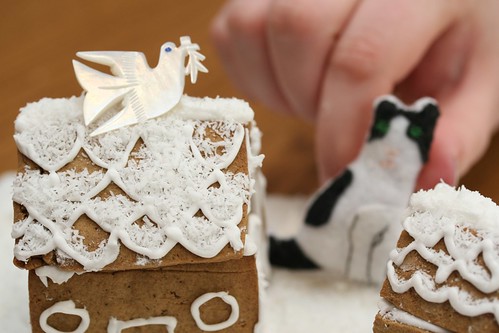
The problem, of course, was that now there was no gingerbread house for the challenge at all. Esther to the rescue! We cut some slices off the (ample) excess dough and made some tiny gingerbread houses.

December 2009 Daring Bakers 6

And, if i say so myself, they are about 10000 times cuter than I could have ever imagined. And so adorably cute! They are living on our coffee table and it is pretty funny watching our cats walk next to them as they look like huge panthers attacking the tiny village.

So, all in all, a less than successful challenge but I got to work some anger out. The challenge was certainly there and I'm glad that I had a go! Thanks, Anna and Y!

December 2009 Daring Bakers 7


Friday, 11 December 2009

Christmas Baking Hooray!

Christmas Treats 3

Last Thursday, I had a half day of work - YAY! My plan was to use the afternoon to plan my Christmas baking and ended up baking all of our baked Christmas gifts whilst Esther organised their packaging and helped me out in the kitchen. How productive of us! *preens*

Our gifts were made up of three things - two of which I had seen on the interwebs days before and one which my mum always used to make at Christmas time.

1. Walnut Shortbread from Lottie + Doof.

Walnut Shortbread 3

This was some amazing shortbread - not too walnutty (which was my fear as I was chopping them), 'sandy' and moist at the same time, made of deliciousness. I highly recommend heading over to Lottie + Doof for the recipe. This was also the first post in their "12 Days of Cookies" and each has been very delicious sounding.

2. Peppermint Bark from Judy in her natural habitat

Peppermint Bark 2

Peppermint Bark isn't a thing in Australia - at least, I've never really noticed it - but it seems to be big in the US, seeing as I've seen approximately 10932890 recipes for it in the last couple of days. In conclusion, melted chocolate and crushed up candy canes - yes, please.

3. Chocolate Boozy Puddings from my mum!

Chocolate Boozy Puddings 2

As I said, my mum used to make these all the time and they were the most fabulous and impressive thing when you are a littlie. The thing is, they are so easy.

1. Purchase a fruit cake from the supermarket
2. Crumble it and sprinkle it with brandy
3. Roll into balls
4. Dip in chocolate. Leave to harden.
5. Drizzle/dip white chocolate on top. Top with green and red things of your choosing to make holly.
6. Impress people.

So delicious. So decadent. So boozy. Now to make some more.

We packed up them up in cute boxes from Spotlight, added a note, packed them in the car and spent Saturday driving around the greater Melbourne area dropping them on people's doorsteps. Yay, Christmas is for the baking!

Christmas Treats 6

Friday, 27 November 2009

Daring Bakers: Cannoli

The November 2009 Daring Bakers Challenge was chosen and hosted by Lisa Michele of Parsley, Sage, Desserts and Line Drives. She chose the Italian Pastry, Cannolo (Cannoli is plural), using the cookbooks Lidia’s Italian-American Kitchen by Lidia Matticchio Bastianich and The Sopranos Family Cookbook by Allen Rucker; recipes by Michelle Scicolone, as ingredient/direction guides. She added her own modifications/changes, so the recipe is not 100% verbatim from either book.

November 2009 Daring Bakers 4

Oh, peeps. Cannoli! One of my loves at Brunneti! One of my loves pretty much anywhere! This month I got to make my own and the results were . . . mixed.

After my last minute panic baking the last couple of months (which resulted in me not participating or not having time to give things a try if they didn’t work 100%), I scheduled a baking day as soon as we had received the assignment. BEST LAID PLANS. I chose a day towards the middle of November, little knowing that we would have a heat wave. 38C + deepfrying didn’t work for me so I postponed. Then it was Esther’s birthday and I had birthday cake to make. Then I had work, volunteer and social commitments every single day for the rest of the month. Finally, on Sunday night, as I was busy cooking up things for dinner with friends on Monday, Esther suggested making the dough so it would be ready to fry up when I got a chance. Genius woman!

The dough came together very quickly and easily and I started to worry that maybe I’d been a been over the top with my worries about making cannoli. I popped it in the fridge until Tuesday morning when I didn’t start work until ten. So I rolled and cut and fried at 8:30 in the morning. My mine problem was that I wasn’t able to roll the dough to the thinness to ensure that it went all bubbly and cannoli like. Reading through the recipe again, I realise I should have actually let it rest a bit more but I was on a schedule so it was overly thick

I made a rose and vanilla cream to fill them with, melted some chocolate and put it all together. They were delicious and fun and I may make them again one day when I have learnt how to roll dough properly.

November 2009 Daring Bakers 1

Tuesday, 17 November 2009

Happy Bee-day!

Chocolate Honey Cake 7

On the weekend, it was my lovely girlfriend Esther’s birthday! Hooray! Even though we went out to high tea with a bunch of friends and there was more cake than you could poke a stick at, I still declared that you cannot have a birthday without a homemade cake and any thoughts to the contrary were a travesty. So, a week ago, we sat down with How To Be A Domestic Goddess and Feast to start the labourious task of choosing a cake.

Official Birthday Cake Choosing Process

1. S-J to read out likely looking cake names from the book. Esther to register interest in certain cakes. Shortlist created.

2. S-J to show pictures of shortlisted cakes to Esther. More cuts made.

3. S-J to read out Nigella’s description to Esther. More cuts made.

4. Ultimate winner declared.

So, you see, birthday cakes are very serious business.

Esther chose Nigella’s Chocolate Honey Cake from Feast mainly, I think, because the bees on top were so cute. She does love honey though so it might have been a combination of factors. There was going to be more rounds of voting as I brought in my 195 delicious bookmarks but there was a clear favourite from the outset.

Chocolate Honey Cake 6

This was a lovely cake to make – it was fairly easy and not particularly time consuming. The best thing about it was that it filled the house with a lovely rich honey smell which was delicious. My only issue was the top of the cake catching a bit but I think that had more to do with the FrankenOven and me upping the temperature a bit to compensate for the lack of insulation of the oven and Nigella did warn against it. After about 30 minutes, I put some aluminium foil over the tin and it was fine. It wasn’t noticeable at all in the final product so hooray!

To me, this is one of those infuriating cakes where you have to let it cool completely before glazing which is just epic baking mocking in my book – the cake is there but don’t eat it! I wasn’t entirely sold the glaze until I had a finished piece of cake (why yes, I did dip a spoon into the glaze to . . . test it). The bees were made by the birthday girl herself who is supremely talented at the fondant-related crafts.

Chocolate Honey Cake 4

This cake was seriously delicious – the cake somehow managed to be cakey & dense and light & smooth at the same time. It was rich but not so rich that you rub your tummy and cry afterwards. And, most surprising to me considering the quantitiy of honey, the honey flavour was very subtle and added a lovely note to an outstanding chocolate cake. Well done, Nigella.

Chocolate Honey Cake
From Nigella Lawson's Feast

for the cake
100g dark chocolate, broken into pieces
275g brown sugar
225g butter, soft
125ml honey
2 eggs
200g plain flour
1 tsp bicarb
1 tbsp cocoa
250ml boiling water

for the glaze
60ml water
125ml honey
175g dark chocolate
75g icing sugar

for the bees
25g royal icing/fondant/marzipan
flaked almonds

Preheat the oven to 180c and butter and line a 23cm springform pan.

Melt the chocolate in the manner you prefer. Leave to cool slightly.
Beat the sugar and butter until airy and creamy and then add in the honey. Add the eggs one at a time, with a spoon full of flour in between each egg. Fold in the melted chocolate, the rest of the flour and the bicarb. Add the cocoa and mix. Scrape down the sides of the bowl and then (carefully) beat in the boiling water. Mix well and then pour into the prepared tin.
Cook for an hour but check regularly and cover with foil if it catches.
Let cake cool.

To make the glaze, bring the water and honey to the boil in a smallish saucepan, take of the heat and add the chocolate, swirling it around so it melts. Sieve in the icing sugar and whisk until smooth.

When the cake is cold, pout the glaze over the cake and smooth it down the sides. It takes a while to set so prepare at least an hour before you want to serve it.

To make the bees, add some yellow food colouring to the bee makings of your choice and mix in. Pinch a little bit off and roll into a little sausage. Use a skewer to paint on some stripes of left over glaze (and eyes if you wish). Use the flaked almonds to make wings.

EAT AND ENJOY! OM NOM.

Tuesday, 27 October 2009

Daring Bakers: Macarons

The 2009 October Daring Bakers’ challenge was brought to us by Ami S. She chose macarons from Claudia Fleming’s The Last Course: The Desserts of Gramercy Tavern as the challenge recipe.


October 2009 Daring Bakers

I now officially have a baking nemesis.

Is it a bit melodramatic to turn an entire (delicious) subset of biscuits into your nemesis? I feel after four failed batches that I'm entitled. I love to eat macarons but, boy howdy, do they not want to be baked by me.

October 2009 Daring Bakers

I was excited when I saw this month's challenge as I'd made two batches of macarons previously with about half a batch of successful biscuits and I was looking forward to beautiful macarons with well-defined feet. I carefully measured and weighed and ground and folded and heated and baked . . . all to no avail.

October 2009 Daring Bakers

So I tried again and had the same results. It's not that they are bad as such. They just aren't macarons.

Reading through the DB forums, I feel like other people had issues with this recipe and I think it was a combination of that, my impatience (even though I tried really really hard!) and our FrankenOven. One day, my precious. One day perfect macarons will be mine. (It doesn't help that the amazing Zumbo macarons are just one post down. Way to sabotage yourself, me!)

My Spiced Chocolate Ganache was DAMN tasty though! Hooray!

October 2009 Daring Bakers


Macarons
Equipment required:
• Electric mixer, preferably a stand mixer with a whisk attachment
• Rubber spatula
• Baking sheets
• Parchment paper or nonstick liners
• Pastry bag (can be disposable)
• Plain half-inch pastry bag tip
• Sifter or sieve
• If you don’t have a pastry bag and/or tips, you can use a Ziploc bag with the corner snipped off
• Oven
• Cooling rack
• Thin-bladed spatula for removing the macaroons from the baking sheets
• Food processor or nut grinder, if grinding your own nuts (ouch!)

Ingredients
Confectioners’ (Icing) sugar: 2 ¼ cups (225 g, 8 oz.)
Almond flour: 2 cups (190 g, 6.7 oz.)
Granulated sugar: 2 tablespoons (25 g , .88 oz.)
Egg whites: 5 (Have at room temperature)

Directions:

1. Preheat the oven to 200°F (93°C). Combine the confectioners’ sugar and almond flour in a medium bowl. If grinding your own nuts, combine nuts and a cup of confectioners’ sugar in the bowl of a food processor and grind until nuts are very fine and powdery.
2. Beat the egg whites in the clean dry bowl of a stand mixer until they hold soft peaks. Slowly add the granulated sugar and beat until the mixture holds stiff peaks.
3. Sift a third of the almond flour mixture into the meringue and fold gently to combine. If you are planning on adding zest or other flavorings to the batter, now is the time. Sift in the remaining almond flour in two batches. Be gentle! Don’t overfold, but fully incorporate your ingredients.
4. Spoon the mixture into a pastry bag fitted with a plain half-inch tip (Ateco #806). You can also use a Ziploc bag with a corner cut off. It’s easiest to fill your bag if you stand it up in a tall glass and fold the top down before spooning in the batter.
5. Pipe one-inch-sized (2.5 cm) mounds of batter onto baking sheets lined with nonstick liners (or parchment paper).
6. Bake the macaroon for 5 minutes. Remove the pan from the oven and raise the temperature to 375°F (190°C). Once the oven is up to temperature, put the pans back in the oven and bake for an additional 7 to 8 minutes, or lightly colored.
7. Cool on a rack before filling.

Yield: 10 dozen.

Thursday, 22 October 2009

Catastrophe Cookies (Or, the biscuits previously known as Afghans.)

I'm a walker.

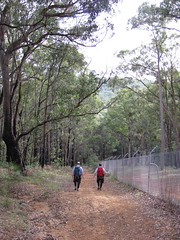
Ridgeway this way (Sep '08)To your right: a fence and then the Silvan resevoir.OH HAI ENTIRE WALK!Wind-blown

I love walking and discovering things and/or seeing things in a different light and/or just taking the time to see. My favourite walk has been The Ridgeway which I walked half of last year (and photos can be seen here) but I've done some amazing walks in and around Melbourne (which can be seen here.)

But what does all this walking have to do with biscuits, you ask?! Well, in March, Not Quite Nigella posted a recipe that is very close to my heart: Afghan Biscuits. I've always loved these biscuits and they are easily obtained in Perth i.e. every single cafe has them. I suddenly realised I'd never seen them in Melbourne and I was aghast.

Catastrophe Cookies 2

I did a very scientific poll of my friends and the results shocked me - nearly everyone who grew up in the Eastern 2/3rds of the country had never heard of, let alone eaten, an Afghan biscuit.

I took it upon myself to write this terrible wrong and made many batches. And it was with one of these early batches that a new (and not so racist) name was bestowed on them. I'll let J, one of the members of my walking posse explain:
Just as we were leaving civilisation (well, we were about to walk into CFA territory rather than MFB territory), our map failed us somewhat by not matching up with what was on the ground. G kindly offered to ride up ahead to see whether one part of the path ended where we thought it did, and the rest of us asked ourselves why we didn’t bring a cyclist all the time. Our question was soon answered as G came off his bike, and we rushed to see what had happened. His elbow was well and truly grazed up, with one significant gouge expelling large amounts of blood. I emptied my waterbottle over his wound to wash as much of the gravel out as I could, then tied a hanky around it. We all walked to the nearest houses and knocked on doors until someone was home and let us use his bathroom. We cleaned G’s elbow a bit more and applied some Dettol cream (thank you, random man), and I cleaned the hanky and reattached it.

SJ called E, and she came with a first aid kit, cleaned the wound with saline, and attached a better dressing than my hanky! As we were waiting for her, we drank the rest of our tea and ate more delicious biscuits. It was at this point that we renamed them Catastrophe Cookies, because they were pretty much the ideal thing to eat at this stage of a catastrophe. E drove G and me to RMH emergency room, where we waited for a couple of hours before G was anaesthetised, cleaned up properly, stitched up, and given a tetnus booster. D and SJ called a taxi and took G’s bike back into SJ & E’s place.
- from here

Anyway, now you know the story of the name, let me explain why these biscuits are so delicious.

1. They are crunchy and crumbly at the same time

2. Chocolate

3. Icing. On a biscuit.

4. They are damn fine with a cup of tea.

Catastrophe Cookies 6

They are also exceptionally quick and easy to make - the only frustrating moment is waiting for them to cool before pouring icing on them.

They are the kind of biscuit you expect to see at the cake stall at a school fête and, to me, that is the highest compliment there is.

Catastrophe Cookies 4

Catastrophe Cookies

makes approx 16

Biscuits
170g butter, softened
100g brown sugar
180g plain flour
1/2 tsp baking powder
3 Tbsp cocoa
60g cornflakes

Icing
3 Tbsp butter
3 Tbsp water
3 Tbsp caster sugar
190g icing sugar
3 Tbsp cocoa
walnut (or pecan) halves

1. Preheat oven to 180C. Cream butter and sugar together while getting the dry ingredients ready to sift.

2. Sift into creamed butter and sugar and mix until combined. The mixture will (most likely) become one big sticky ball of deliciousness.

3. Stir in the cornflakes (or, if you are lazy like me, pour the cornflakes in and mix on a low setting until combined).

4. Roll into balls and place on a lined baking tray. Flatten them a little bit and try not to overcrowd the tray - they don't spread a lot but you do want them all to bake at the same speed.

5. Bake for 15 minutes. Remove from oven. They'll be quite fragile at this stage but they become more hardy as they cool.

6. Cool. (Boo.)

7. Make the icing! Spoon the icing onto the biscuits and press a walnut (or, in this case, a pecan) onto the biscuit.

8. EAT AND ENJOY!